##### 新建服务可以多参考已有服务
假如要在joolun-weixin下新建一个joolun-weixin-dome的服务
-
新服务可放在主项目里,也可放在支项目里,以自己实际需求为准,这里教程是放在weixin支项目里,原理都是一样的
-
复制joolun-weixin-admin命名为joolun-weixin-demo
-
com.joolun.cloud包名不要改动,否则系统无法运行
-
修改模块名admin为demo(com.joolun.cloud.demo)
-
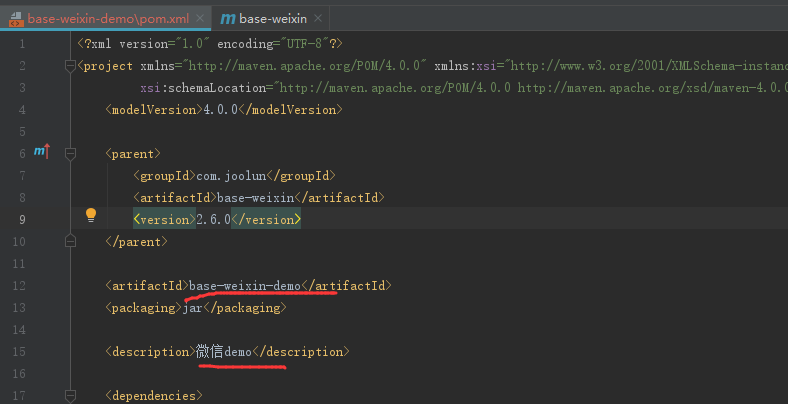
修改pom文件(joolun-plus\joolun-weixin\joolun-weixin-demo\pom.xml),下面截图里命名用的base-weixin,以自己实际命名为准
-
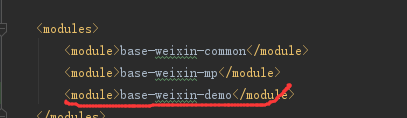
父模块增加子模块配置(joolun-plus\joolun-weixin\pom.xml)
-
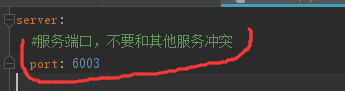
修改配置文件(joolun-plus\joolun-weixin\joolun-weixin-demo\src\main\resources\bootstrap.yml)
-
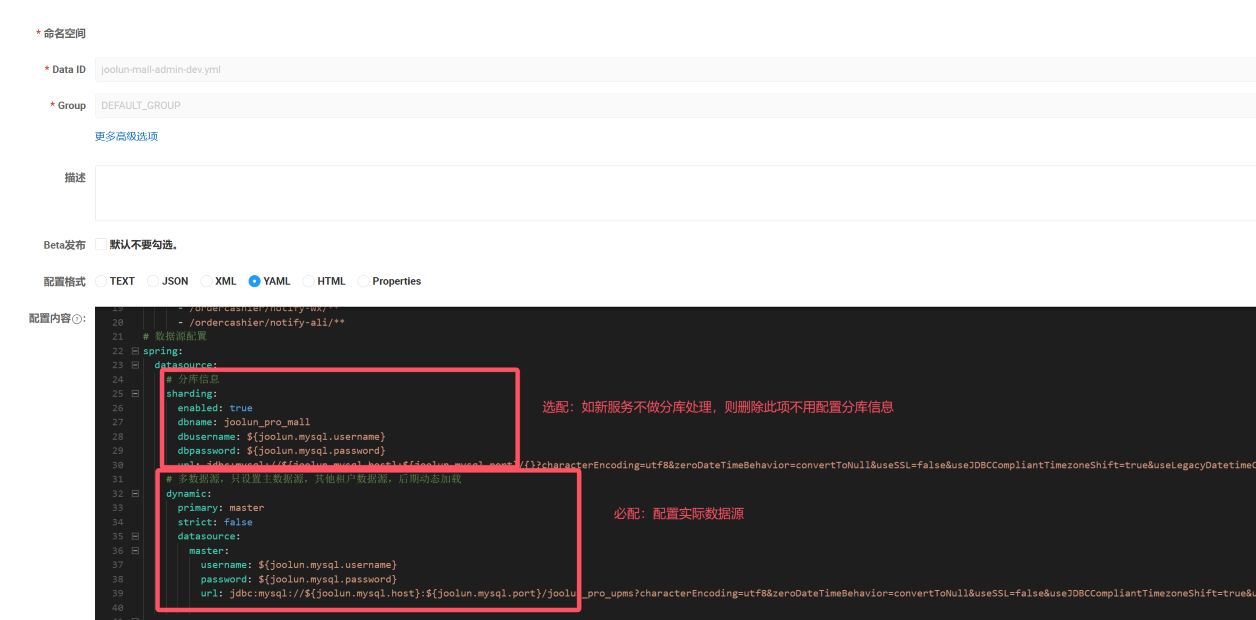
nacos配置中心新建 joolun-weixin-demo-dev.yml配置文件(http://127.0.0.1:8848/nacos/index.html );文件名规则{artifactId}-dev.yml,artifactId对应新服务的pom.xml中的artifactId
注:client-id和client-secret可以直接用weixin/weixin,也可在后台的【终端管理】中参照weixin添加一个新的终端。不然接口将无法访问
-
重命名BaseWeiXinApplication为BaseWxDemoApplication
-
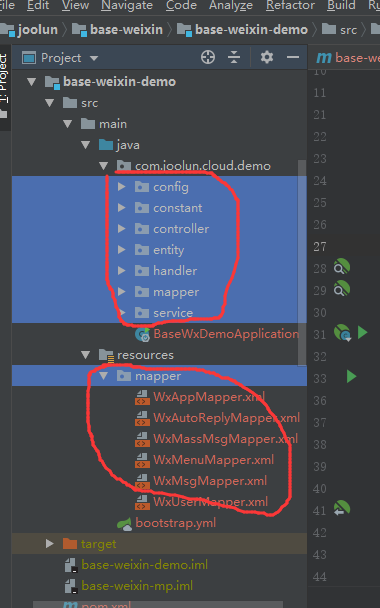
删除多余文件
-
nacos中配置动态路由(dynamic_routes) 模仿joolun-weixin-admin新增一条路由
# joolun-weixin-demo
- id: joolun-weixin-demo
  predicates:
  - name: Path
    args:
      _genkey_0: /demo/**
  filters: []
  uri: lb://joolun-weixin-demo
  order: 0
-
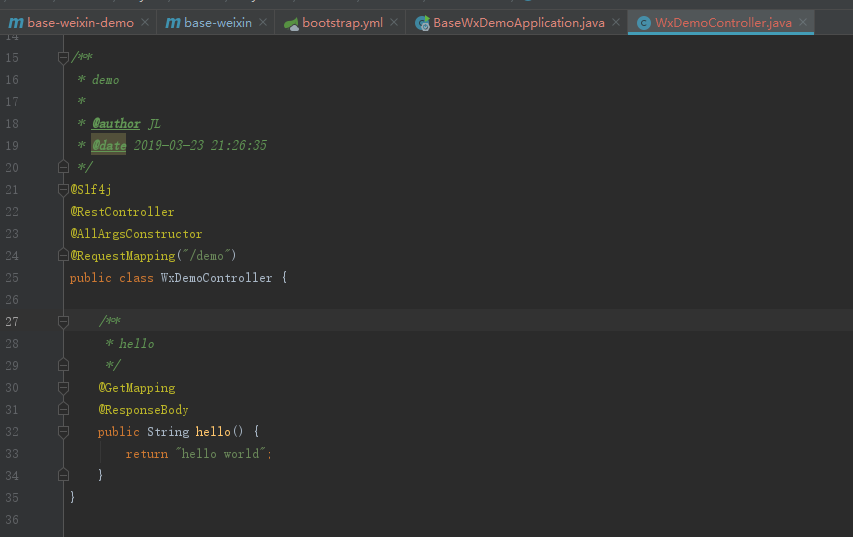
新建测试类(joolun-plus\joolun\joolun-weixin\joolun-weixin-demo\src\main\java\com\joolun\cloud\demo\controller\WxDemoController.java)
-
清空redis缓存
-
依次启动nacos、joolun-gateway、joolun-auth、joolun-upms-admin、joolun-weixin-demo)
-
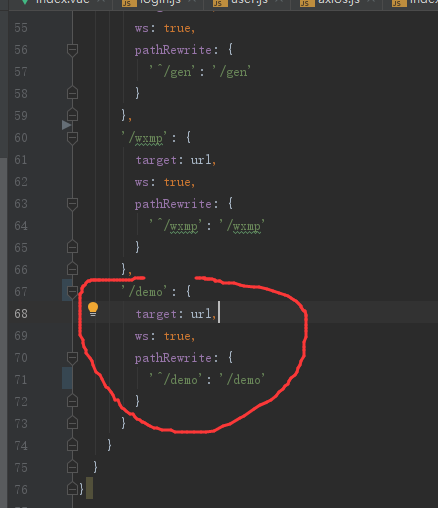
前端本地启动时配置转发代理(joolun-plus\joolun-plus-ui\vite.config.ts) 转发代理要和nacos中配置动态路由对上
-
启动前端项目
-
生产环境要在nginx中添加demo的转发代理
server {
        listen       80;
        server_name  localhost;

        # 打包好的dist目录
        root /mnt/install/joolun-ui/dist/;

        location ~* ^/(auth|code|admin|gen|weixin|mall|doc|webjars|swagger-resources|upms|demo) {
           proxy_pass http://127.0.0.1:9999;
           #proxy_set_header Host $http_host;
           proxy_connect_timeout 15s;
           proxy_send_timeout 15s;
           proxy_read_timeout 15s;
           proxy_set_header X-Real-IP $remote_addr;
           proxy_set_header X-Forwarded-For $proxy_add_x_forwarded_for;
        }
        error_page   500 502 503 504  /50x.html;
        location = /50x.html {
            root   html;
        }
    }
postman接口调试
-
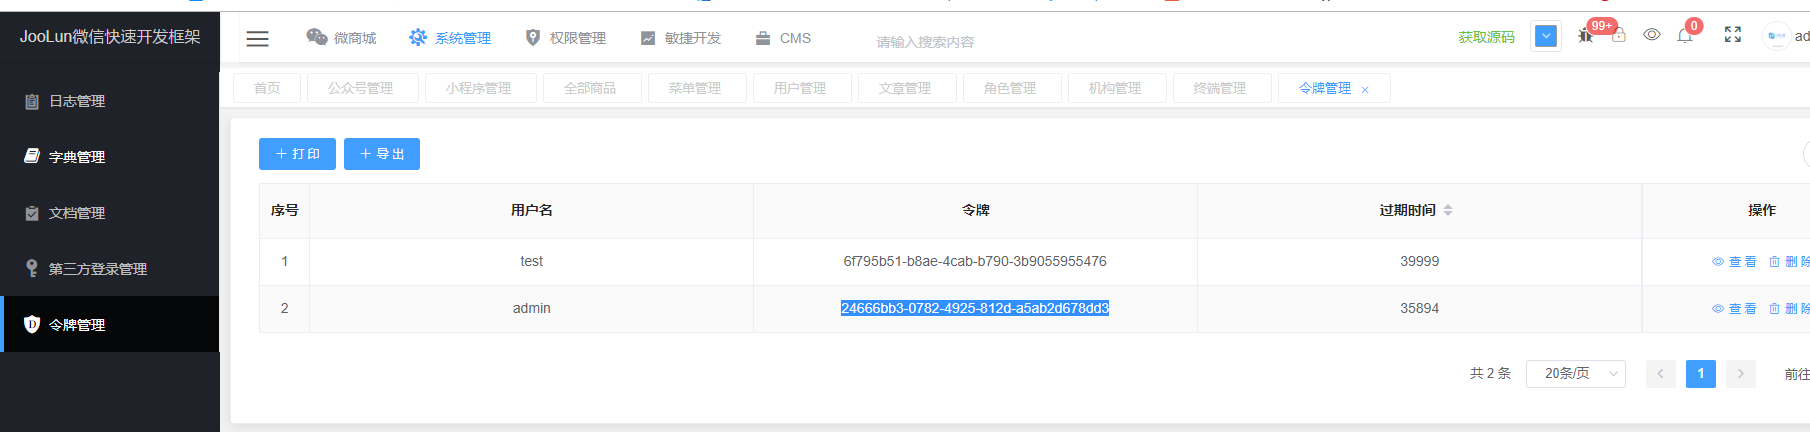
从后台的令牌管理中复制你账号的令牌
-
postman访问http://localhost:8082/demo/demo
-
接口访问地址说明:假如我要访问src\main\java\com\joolun\cloud\weixin\admin\controller\WxAppController.java中的@GetMapping("/page")方法;
- 第一种:通过vue项目或网关访问:http://localhost:8082/weixin/wxapp/page或http://localhost:9999/weixin/wxapp/page ;需要加上weixin前缀,即nacos配置中动态路由(dynamic_routes)weixin-admin的_genkey_0
- 第二种:直接通过weixin服务的端口访问:http://localhost:6002/wxapp/page ;6002是weixin服务的端口,所以不要加weixin前缀
-
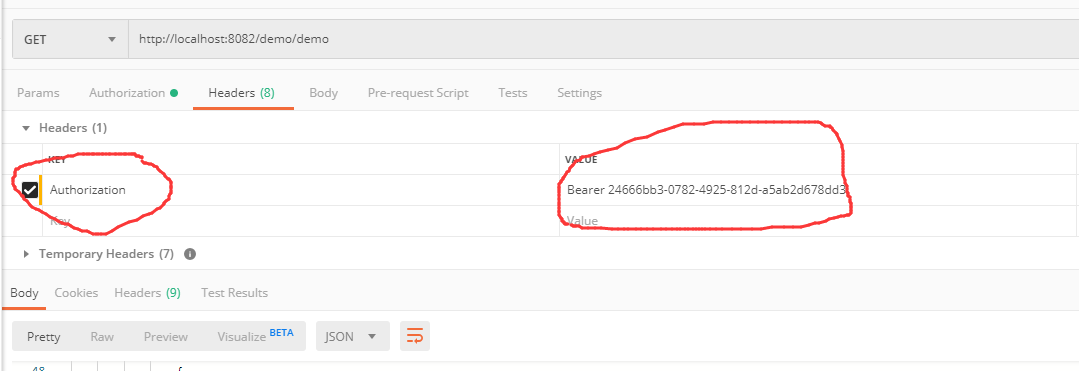
headers中加入Authorization属性,值为:Bearer+ 空格 +令牌,如下图
-
如果想不用token直接访问,请查看文档【A-接口直接对外暴露】